For clients to be able to complete the Insurance Info page from the client portal, you must first select which insurance payers with which you work. Your clients will only be able to select insurance provider options that you have designated as ones you accept.
Note: If you do not take insurance, but plan to file on behalf of clients as a service to them, you must have insurance enabled on your account, and you must add to the system each insurance provider you will be filing with. Also be sure to change the accept assignment setting in the client's insurance info, or manually on each claim, prior to submitting.
Note: If this is your first time working with insurance, your practice will need to contact and register with each insurance provider that you plan to accept prior to submitting any claims. You MUST first register with an insurance provider (payer) to be able to receive payments for claims.
Note: If an insurance you work with is not listed, contact your account manager and inquire as to its availability.
ON THIS PAGE:
•How to designate which insurance payers your practice accepts
•How to add Custom Offline Insurance Payers
•How to remove an insurance payer from your Accepted Payers list
How to designate which insurance payers your practice accepts:
1. Select the Settings icon and then the Practice Settings tab.

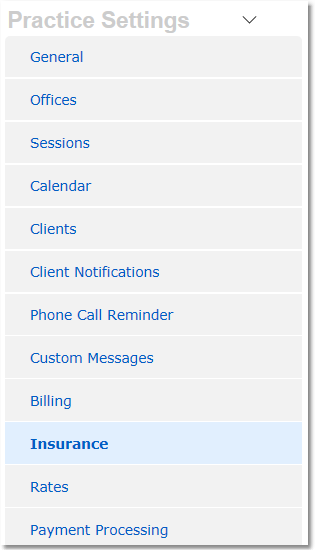
2. Select the Insurance option from the menu options on the left.

3. Under the Accepted Insurance Payers heading, click on the Set up Accepted Insurance Payers button.

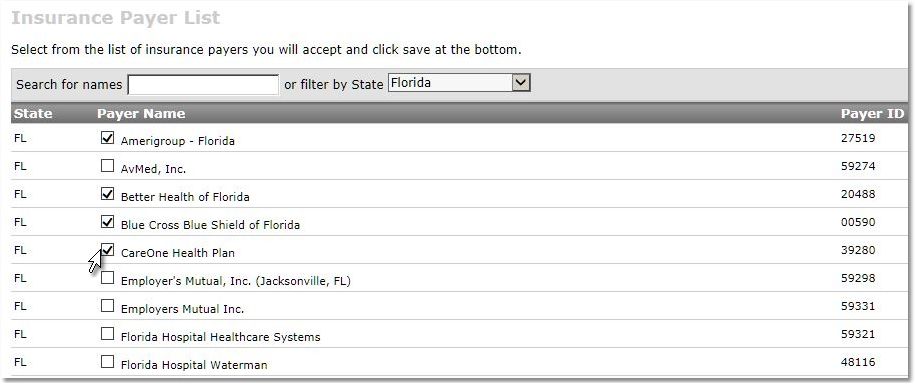
4. Search by name or filter by state. Check the box next to each accepted payer.

5. Once all accepted payers have been selected scroll all the way to the bottom and click Save.

Add Custom Offline Insurance Payers: (optional)
This option is used when the payer is not listed on the Clearinghouse Insurance Payer List and/or for payer who require the Payer's physical address be included with the electronic claim (e.g. Magellan).
1. Select the Settings icon and then the Practice Settings tab.

2. Select the Insurance option from the menu options on the left.

3. Under the Custom Offline Insurance Payers heading click on Add Custom Offline Insurance Payers link. If you do not see the link, contact your account manager to have this feature enabled.
4. Enter the payer information and click Save.

How to remove an insurance payer from your Accepted Payers list:
1. Go to Settings > Practice Settings > Insurance
2. Within your list of Accepted Payers, click on the name of the payer to be removed to open the Edit Payer Details page.
3. Scroll the to the bottom of the Edit Payer Details page and click Remove Payer.
4. Type YES in the confirmation box, then click the Remove Payer button.