ERA (Electronic Remittance Advice) files detail amounts, applied payments, etc., along with payment codes, which describe why payments are paid or denied. The payer generates a file containing all the payment information and sends the file to CounSol.com. You can then view the information on the ERA page, review the file details, allocate payments to the patient's/client's account, and, if needed, print the report or export it.
NOTE: To actually receive ERAs from a payer, you may need to complete an ERA Enrollment form. We recommend confirming with an Office Ally representative that your payer will return ERAs, and which, if any, enrollment forms are required.
NOTE: If you were previously receiving ERAs through Office Ally with another account, but will now be using a new account, you must complete an ERA Transfer Letter so that new ERAs are sent only to your new account.
Please reach out to your account manager with any questions regarding ERA viewing and processing.
ON THIS PAGE:
•Enable ERA viewing and processing on your account
•Post ERA results (individual, bulk, auto)
•View and process ERAs for a specific client
•Sample ERA Claim file
How to enable ERA viewing and processing on your account:
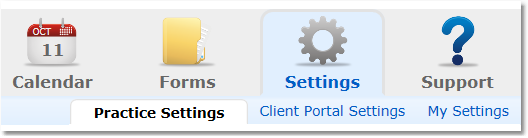
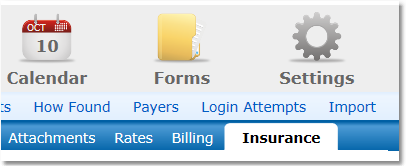
1. Select the Settings icon and then the Practice Settings tab.
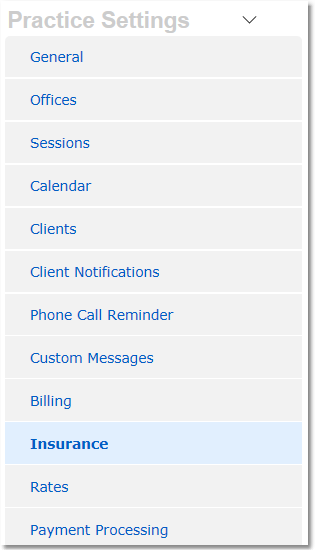
2. Select the Insurance option from the menu options on the left.
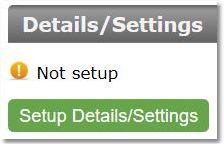
3. If you are entering your details for the first time, click the Setup Details/Settings button. If you are returning to make changes, click Edit Details/Settings
4. Choose "Enabled" from the drop-down menu under ERA Viewing and Processing.
Note: You must be setup with Office Ally to enable ERA viewing and processing.
5. Click Save at the bottom of the page.
How to post individual ERA results:
1. Select the Billing icon, and click on the ERA link.

(If you do not see the ERA link, you must first enable ERA viewing and processing in your Edit Details/Settings page in the Insurance section)
2. Click on the details of an ERA to open and view the complete ERA.
Note: New ERAs will arrive on the Pending status page.
3. Scroll to the bottom of the page and click the Enter Transaction button to post the payment to the client's account/invoice(s).
How to bulk post ERA results:
Note: You must first request this feature be enabled by contacting your personal account manager, or email support@Counsol.com.
1. Select the Billing icon, and click on the ERA link.
2. Use the check boxes at the left to select all ERAs you'd like to post simultaneously.
3. Scroll to the bottom of the page and click the green "Bulk Enter Transactions" button.
Note: Any ERAs with un-mapped adjustment codes, or changes made to the invoice details, will not be posted and must be opened and posted individually.
How to automatically post ERA results:
Please contact your personal account manager to discuss automatic ERA posting.
How to view and process ERAs for a specific client:
1. Select the Clients icon, and then click on the desired client’s name from the Active client list.
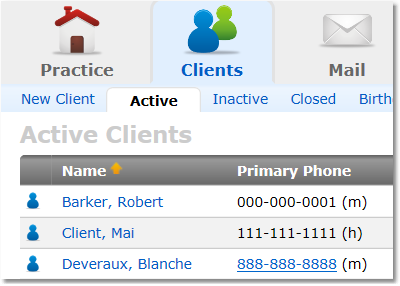
2. Click on the Insurance tab in the client's dark blue menu bar.
3. Click the View ERA Claims button.
(If you do not see the ERA Claims button, you must first enable ERA viewing and processing in your Edit Details/Settings page in the Insurance section)
4. Click on the details of an ERA to view the complete ERA.

5. Review the complete ERA details and click the Enter Transaction button to post the payment to the client's account/Invoice(s).
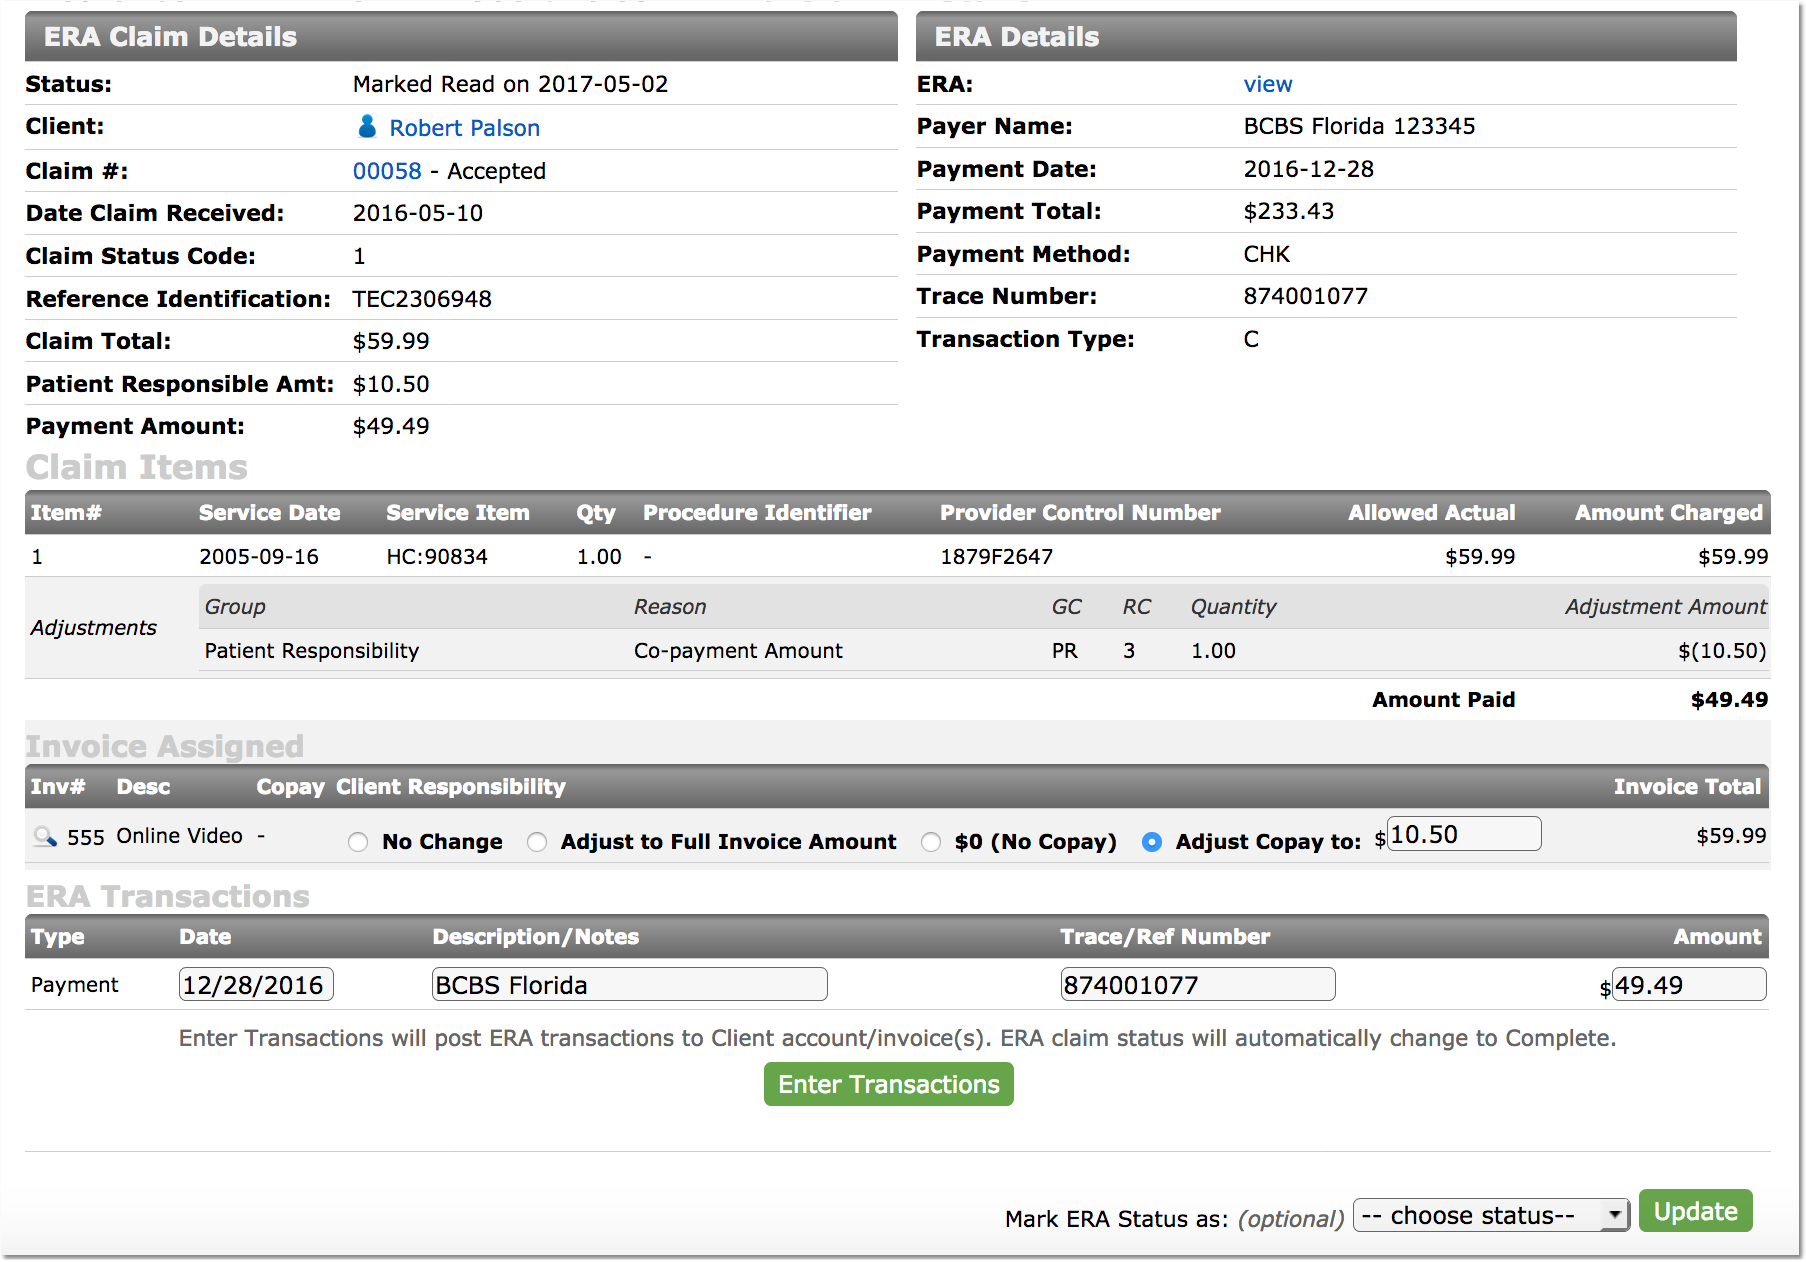
Sample ERA Claim file: