Registration messages are optional. All the necessary information for accessing the portal post registration is included by default, but sometimes there is additional instruction or information necessary.
The Post Registration Comment appears immediately after a client has registered online (using the self-registration page). If you are not allowing clients to register themselves, this message will not be seen.
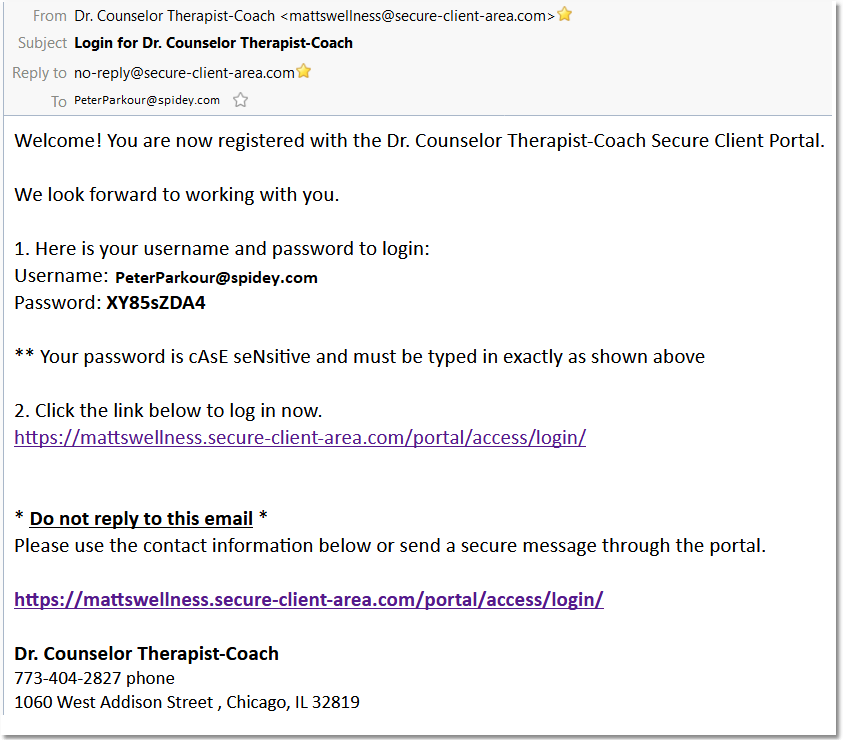
Your Welcome Email Message will be displayed in the welcome email that is sent to the client after registration. Along with your message, the welcome email will display the client's username, password, and a link to the secure client portal login page.
How to add a Portal Post-Registration Comment to appear on the client portal after a new client completes registration.
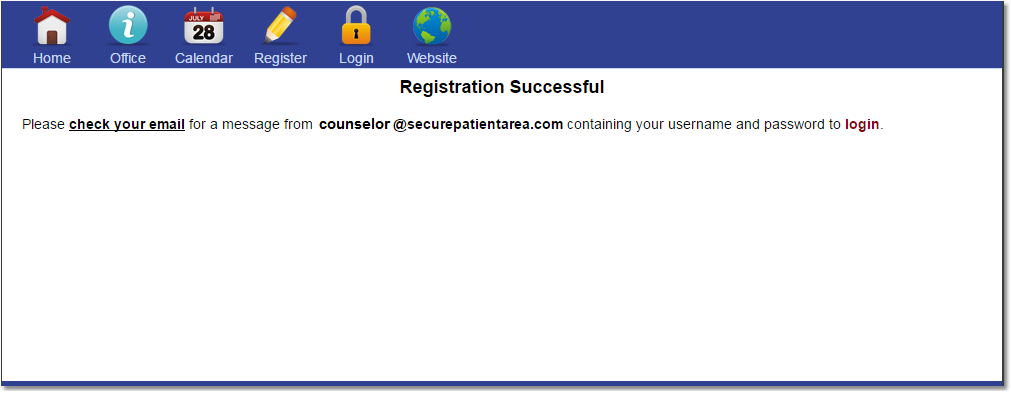
Your post-registration comment will be displayed on the client portal Registration Success page after a client completes registration.
1. Click on the Settings icon and then click on the Practice Settings tab.

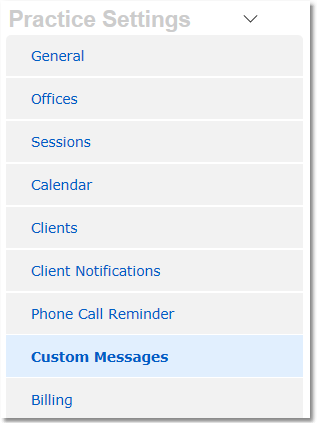
2. Select Custom Messages from the menu options on the left.

3. At the top is the Portal Post-Registration Comment field. Enter your custom message there.

4. Click the Save Settings button.

Example Registration Success Page (without comment):

Example Registration Success Page (with comment):

How to add a Welcome Email Message to the Welcome Email sent after a new client completes registration:
1. Click on the Settings icon and then click on the Practice Settings tab.

2. Select Custom Messages from the menu options on the left.

3. Locate the Welcome Email Message field. Enter your custom message there.

4. Click the Save Settings button.

Welcome Email Example (with message):

Note: In the example above, "We look forward to working with you." is the customized Welcome Email Message. All other text/links referencing login and your practice details are standard content in the Welcome Email.