Couples and families will often be seen together. To keep you from having to book overlapping sessions, you can add secondary clients to a session when booking for an individual. The primary client will be only one to receive an invoice, but all included clients will show attendance in the session to allow for individual/copied notation where appropriate.
Make sure clients are already marked as related in the system. If you have not yet designated clients as related, Click Here for instructions on how to do so.
NOTE: You can NOT schedule a video session with multiple people if the clients will be on different computers. Video sessions must be a one-to-one connection.
How to schedule a session with related clients:
Option 1
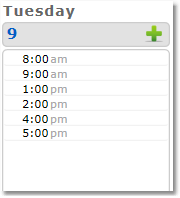
1. Select the Calendar icon and click on the desired session time on your calendar.

2. Under the Format drop-down menu, select Private Session.
3. Select one of the related clients you want to schedule from the Client drop-down list.
NOTE: The primary (first) client will be the account assigned the session invoice and therefore responsible for payment. The secondary client will not be assigned an invoice.
4. Select the Type of session and Length, then click Continue.
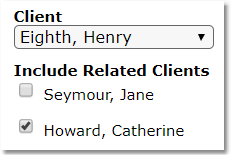
5. Under the client's name will be Include Related Clients with all registered related client names below.

6. To include a related client in the session, check the box next to the related client's name.
7. Review and edit the details (Date, Time, Rate and CPT code) of the appointment as necessary, then click the Save Appointment button.
Option 2
1. Select the Sessions icon and click the Schedule New tab.

2. On the next screen, select a Format type from the drop-down menu (Descriptions of Format Types) and click the Continue button.
3. Select the Client from the drop-down list.
NOTE: The primary (first) client will be the account assigned the session invoice and therefore responsible for payment. The secondary client will not be assigned an invoice.
4. Select the Type of Session and Length, then click Continue.
5. Under the client's name will be Include Related Clients with all registered related client names below.

6. To include a related client in the session, check the box next to the related client's name.
7. Review and edit the details (Date, Time, Rate, Recurrence and CPT Code) of the appointment as necessary, then click the Save Appointment button.
Option 3
1. Select the Clients icon, then click on the desired client’s name from the Active client list.
NOTE: The primary (first) client will be the account assigned the session invoice and therefore responsible for payment. The secondary client will not be assigned an invoice.
2. Click the New Appointment button on the right-hand side of the page.

3. Select the Format Type (Descriptions of Format Types)
4. Select the Type of Session and Length, then click Continue.
5. Under the client's name will be Include Related Clients with all registered related client names below.

6. To include a related client in the session, check the box next to the related client's name.
7. Review and edit the details (Date, Time, Rate, Recurrence and CPT Code) of the appointment as necessary, then click the Save Appointment button.