Various methods for scheduling a session:
Option 1
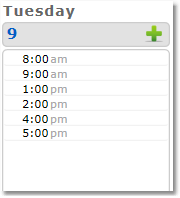
1. Select the Calendar icon and click on a vacant session time.

2. On the next screen, select a Format type from the drop-down menu (Descriptions of Format Types) and click the Continue button.
3. Select the Client from the drop-down list.
4. Select the Type of Session and Length, then click Continue.
5. Review and edit the details (Date, Time, Rate, Recurrence and CPT Code) of the appointment as necessary.
Note: Designate Recurrences for clients who require sessions on a consistent basis at the same time and day of the week.
Note: CPT Code designation is optional, however, if your client submits insurance claims with superbills for payment reimbursement, insurance companies require that a CPT Code be listed on all superbills.
6. OPTIONAL: Add a note for yourself regarding the session in the Internal Description box.
7. Select whether or not you will Require Confirmation.
Note: If set "No" the session will be booked on your calendar. If set to "Yes" the client will be notified of your requested session time, but the session will not be booked/confirmed until the client has logged in and confirmed the session from the Client Portal.
8. Select whether or not to Send Notification.
Note: If set to "Yes" a notification/confirmation of the booking will be sent to the client - as long as Session Scheduled notifications are turned on for the client. If set to "No", or if Session Schedule notifications are turned off for the client, no notification will be sent.
9. Click the Save Appointment button.
Option 2
1. Select the Sessions icon and click the Schedule New tab.

2. On the next screen, select a Format type from the drop-down menu (Descriptions of Format Types) and click the Continue button.
3. Select the Client from the drop-down list.
4. Select the Type of Session and Length, then click Continue.
5. Review and edit the details (Date, Time, Rate, Recurrence and CPT Code) of the appointment as necessary.
Note: Designate Recurrences for clients who require sessions on a consistent basis at the same time and day of the week.
Note: CPT Code designation is optional, however, if your client submits insurance claims with superbills for payment reimbursement, insurance companies require that a CPT Code be listed on all superbills.
6. OPTIONAL: Add a note for yourself regarding the session in the Internal Description box.
7. Select whether or not you will Require Confirmation.
Note: If set "No" the session will be booked on your calendar. If set to "Yes" the client will be notified of your requested session time, but the session will not be booked/confirmed until the client has logged in and confirmed the session from the Client Portal.
8. Select whether or not to Send Notification.
Note: If set to "Yes" a notification/confirmation of the booking will be sent to the client - as long as Session Scheduled notifications are turned on for the client. If set to "No", or if Session Schedule notifications are turned off for the client, no notification will be sent.
9. Click the Save Appointment button.
Option 3
1. Select the Clients icon, then click on the desired client’s name from the Active client list.
2. Click the New Appointment button on the right-hand side of the page.

3. Select the Format Type (Descriptions of Format Types)
4. Select the Type of Session and Length, then click Continue.
5. Review and edit the details (Date, Time, Rate, Recurrence and CPT Code) of the appointment as necessary.
Note: Designate Recurrences for clients who require sessions on a consistent basis at the same time and day of the week.
Note: CPT Code designation is optional, however, if your client submits insurance claims with superbills for payment reimbursement, insurance companies require that a CPT Code be listed on all superbills.
6. OPTIONAL: Add a note for yourself regarding the session in the Internal Description box.
7. Select whether or not you will Require Confirmation.
Note: If set "No" the session will be booked on your calendar. If set to "Yes" the client will be notified of your requested session time, but the session will not be booked/confirmed until the client has logged in and confirmed the session from the Client Portal.
8. Select whether or not to Send Notification.
Note: If set to "Yes" a notification/confirmation of the booking will be sent to the client - as long as Session Scheduled notifications are turned on for the client. If set to "No", or if Session Schedule notifications are turned off for the client, no notification will be sent.
9. Click the Save Appointment button.